Showing posts with label Breads. Show all posts

Friday, February 28, 2025

Classic King Cake

Taste of the South photo

Traditional for Mardi Gras, this is worth spending the time on. 

A few years ago Taste of the South magazine published this recipe. I'd only had store-bought King Cakes and they were no treat, believe me. So I gave this a whirl. Not only was it easier than I thought it would be, but it was absolutely delicious. In fact, my friend Patsy, who grew up in Dallas, said she'd never had one that tasted so good. 

 I hereby pass it along to anyone who wants the real reason to celebrate right before Lent begins.

 I didn't have the traditional purple colored sugar to go along with the green and yellow, but red makes a nice display also! After all, it all tastes the same.

Leftovers freeze well. Or you can look at it as the perfect opportunity to share with friends and family. Everyone likes it when I make King Cake!

Also a 12" wreath is quite large, however I have tried making two smaller wreaths and it just doesn't work for proper shaping. So go big for Mardi Gras!

CLASSIC KING CAKE
 
Yields: 1 (12-inch) wreath
 
Ingredients
  • 4 to 4¼ cups bread flour, divided
  • ¼ cup granulated sugar
  • 1 (0.25-ounce) package instant yeast
  • 2 teaspoons kosher salt
  • ½ cup plus 1 tablespoon water, divided
  • ½ cup whole milk
  • ½ cup unsalted butter
  • 2 large eggs, divided
  • 1 egg yolk
  • Almond Cream (recipe follows)
  • Cream Cheese Icing (recipe follows)
  • Garnish: colored sanding sugar

    Almond Cream
  • 6 tablespoons unsalted butter, softened
  • ½ cup sugar
  • 1⅓ cups almond meal
  • 1 large egg
  • ¼ to ½ teaspoon almond extract
  • ½ cup all-purpose flour
  • ¼ teaspoon kosher salt

    Cream Cheese Icing (I myself prefer a simple medium frosting made from confectioner's sugar and milk. Suit your own taste.)
  • 1 (8-ounce) package cream cheese, softened
  • 1 tablespoon whole milk
  • 1 teaspoon vanilla extract
  • ⅛ teaspoon kosher salt
  • 1½ cups confectioners’ sugar

Instructions
  1. In the bowl of a stand mixer fitted with the paddle attachment, combine 2 cups flour, granulated sugar, yeast, and salt. Spray a large bowl with cooking spray.
  2. In a medium saucepan, heat ½ cup water, milk, and butter over medium heat until an instant-read thermometer registers 120° to 130°. Add warm milk mixture to flour mixture, beating at medium speed until combined and cooled slightly, about 2 minutes. Add 1 egg and egg yolk, beating at medium speed until combined. With mixer on low speed, gradually add 2 cups flour, beating just until combined and stopping to scrape sides of bowl as needed.
  3. Switch to the dough hook attachment. Beat at low speed until a soft, somewhat sticky dough forms, about 6 to 7 minutes, stopping to scrape dough hook and sides of bowl as needed. (Add up to remaining ¼ cup flour, adding 1 tablespoon at a time, if dough is too sticky.)
  4. On a lightly floured surface, shape dough into a smooth ball. Place dough in prepared bowl, turning to grease top. Cover and let rise in a warm, draft-free place (75°) until doubled in size, 45 minutes to 1 hour.
  5. In a small bowl, whisk together remaining 1 egg and remaining 1 tablespoon water.
  6. Lightly punch down dough. Cover and let stand for 5 minutes. Turn out dough onto a lightly floured surface, and roll into a 24×2-inch rectangle. Spread Almond Cream onto dough, leaving a ½-inch border on one long side. Brush border with egg wash. Starting with other long side, roll up dough, jelly roll style; pinch seam to seal. Using a serrated knife dipped in flour, trim ½-inch off each end of log. Form into a circle. Brush ends with egg wash and press together, pinching dough to seal. Carefully place wreath on a piece of parchment paper.
  7. Using a serrated knife or kitchen scissors, makes cuts three-fourths of the way through the dough, 1 inch apart, leaving the center of wreath intact. Gently pull and turn each slice onto its side, slightly overlapping with the previous piece. Slide parchment onto a rimless baking sheet. Cover and let rise in a warm, draft-free place (75°) until puffed, 20 to 30 minutes.
  8. Preheat oven to 350°.
  9. Brush dough with egg wash. Bake until lightly golden and an instant-read thermometer inserted in center registers 190°, 30 to 35 minutes, loosely covering with foil to prevent excess browning, if necessary. Let cool on pan for 10 minutes. Remove from pan. Spread with Cream Cheese Icing. Garnish with colored sanding sugar, if desired.
For Almond Cream
  1. In the bowl of a stand mixer fitted with paddle attachment, beat butter and sugar on medium speed until creamy, about 2 minutes. Beat in almond meal until combined. Add egg and almond extract, beating on low until combined. Beat in flour and salt. Refrigerate until ready to use.
For Cream Cheese Icing
  1. In a medium bowl, beat cream cheese, milk, vanilla, and salt on medium speed until smooth. Slowly add confectioners’ sugar, beating on low until smooth.

Wednesday, June 03, 2020

Savory (Ham, Mozzarella & Basil) Brioche Couronne

Couronne means "crown" and this is obviously named for the shape. However, it is also fit for royalty. An enriched brioche dough is filled with ham, mozzarella and basil to make a wonderful meal.

This is from Paul Hollywood's book Bread and it looks a lot harder than it is. On one hand it does take a fair amount of time for several dough risings. On the other hand, it is really impressive and really delicious and really basic to put together if you are used to making bread. If you aren't, then Paul Hollywood's description will lead you through it without a problem.

Mom said it was better than pizza. Tom didn't want to make rash statements but he agreed it was at least equal to a very, very good pizza.

Savoury Brioche Couronne

Ingredients
500g strong white bread flour, plus extra for dusting
10g salt
10g instant yeast
170ml tepid whole milk
4 medium eggs (we used 3 large eggs)
250g unsalted butter, in small pieces, at room temperature
1 pound buffalo mozzarella (we used regular fresh mozzarella)
8-10 slices Parma ham (turns out this is proscuitto - we didn't know that and used applewood smoked ham - mmmm)
Small handful basil leaves, roughly chopped
1 medium egg, beaten
Pinch salt
Handful grated parmesan

Put the flour into a food mixer fitted with a dough hook and add the salt to one side of the bowl and the yeast to the other. Add the milk and eggs and mix until well combined. Add the butter, bit by bit, as you mix for a further 5 minutes. It’s important to add the butter very gradually.

Tip the dough into a large oiled plastic container or bowl and covered with an oiled lid or cling film [plastic wrap]. This dough can rise greatly and needs room to expand. Leave until at least doubled in size — at least 1 hour.

Tip the dough out onto a lightly floured surface, without knocking the air out of it. Roll out to a rectangle, just under 1½cm (3/4 inch) with the long side facing you. Lay the ham slices over the dough. Tear the mozzarella into pieces and scatter over the ham. Sprinkle basil on top.

Roll up the dough from the long side furthest from you to enclose the filling. Roll into a sausage, 40-50cm [16-19 inches]. Cut down the entire length of the roll to reveal the filling [leaving you with two long strips side by side]. Hol the pieces firmly at each end and twist quite tightly together, moving your hands in opposite directions. Now coil the twisted dough into a circle and press the ends firmly together.

Put the crown on a parchment-paper lined baking tray. Put the tray inside a roomy plastic bag and leave to rise for 1-1½ hours, or until at least doubled in size. [We just covered the baking sheet with a towel, as per always.]

Preheat the oven to 400°.  Brush the top of the couronne with beaten egg and scatter with grated Parmesan. Bake in oven for 25 minutes until golden brown. Leave to cool slightly and serve warm or cold.

Thursday, November 07, 2019

Whole-Grain Banana Bread

Mom insisted this was a great Banana Bread so we tried it. I wouldn't have believed you could get such a good quick bread that also is whole-grain but King Arthur's Flour (and Mom!) proved me wrong.

Whole-Grain Banana Bread

Step 1

2 cups (454g) thoroughly mashed banana, about 4 or 5 medium bananas
2/3 cup melted butter or 1/2 cup (99g) vegetable oil
1 cup (213g) brown sugar
2 large eggs
1 teaspoon vanilla extract

Preheat oven to 350°F with rack in the center. Lightly grease a 9” x 5” loaf pan; if your pan is glass or stoneware, reduce the oven temperature to 325°F.

Stir together the mashed banana, oil, sugar, eggs, and vanilla.

Step 2

1 cup (120g) King Arthur Unbleached All-Purpose Flour
1 cup (113g) King Arthur White Whole Wheat Flour or Premium Whole Wheat Flour
1 teaspoon baking soda
1/2 teaspoon baking powder
3/4 teaspoon salt
1 teaspoon ground cinnamon
1/2 cup (57g) chopped walnuts, toasted if desired; optional

Combine all ingredients. Then mix into the banana mixture. Scrape the bottom and sides of the bowl and mix again to thoroughly combine the ingredients.

Step 3

1 tablespoon (13g) sugar
1/2 teaspoon ground cinnamon

Scoop the batter into the prepared pan. Mix together the sugar and cinnamon, and sprinkle over the batter.

Bake 60-75 minutes, until bread feels set on the top, and a tester comes out clean, or with just a few moist crumbs (but no wet batter). If the bread appears to be browning too quickly, tent it with aluminum foil for the final 15 to 20 minutes of baking. Note: If baking in a glass or stoneware pan, increase the baking time by 10 to 15 minutes.

Remove the bread from the oven. Cool it in the pan for 15 minutes, then loosen the edges, and turn it out of the pan onto a rack to cool completely.

Store leftover bread, tightly wrapped, at room temperature for several days. Freeze for longer storage. Makes 12 generous servings.

Note
This recipe will make 15 standard-size muffins. Bake muffins in a preheated 350°F oven for 20 to 23 minutes.

Wednesday, December 22, 2010

Pecan Rolls

Our family's traditional Christmas breakfast, these Pecan Rolls are probably actually Schnecken from Germany. However, as pecans are native to America, these have been Americanized.

We have one pan on Christmas morning and I freeze the other to thaw and warm for New Year's breakfast. A sweet start to the new year, right?

These are simple and the result is impressive. The only thing you need to have plenty of is time as the recipe is a fairly forgiving one. 

It originally came from the Meta Given's Modern Encyclopedia of Cooking which was my mother's go-to book for many recipes that became family favorites ... such as the Tuna Puff Log. Yes, it sounds strange but it was a brioche loaf which one baked and then cut off the lid to in order to hollow out and fill with a delicious creamed tuna (fairly stiff but with walnuts and a dash of nutmeg). It made a surprisingly sophisticated dish which I seem to recall my parents serving to company ... who would eat seconds.
I have adapted the dough recipe for this somewhat to modernize it and I divided it into steps to make it easier to follow. I also simplified it as I am used to kneading yeast breads, etc. But the rest is pure Meta Given.

Pecan Rolls

Step 1:
1/3 cup butter, melted
1 cup warm milk
1 egg, lightly beaten
1/3 cup sugar
1 teaspoon salt
1 tablespoon yeast (or 1 package yeast)
1/2 teaspoon malt powder (optional, I get it from King Arthur flour, not in the original recipe)
4 cups flour

Combine and knead as usual for yeast dough. Let rise. Punch down dough, turn out on a lightly floured counter and let rest 10 minutes.

Step 2:
1-1/3 cups moist light brown sugar
1/2 cup butter, room temperature
1/4 cup white corn syrup
Pecan halves or pieces

Meanwhile, mix brown sugar, butter and corn syrup until smooth and spread in the bottom of two 9” cake pans. Place pecan halves (upside down) in circles covering pan spread. If using pieces, press enough cover thoroughly firmly into mixture. Set pans aside until after rolls have been made.

Step 3:
1/2 cup soft butter
1/2 cup white sugar
1 teaspoon cinnamon

Roll half of dough into a 8x10” rectangle, about 1/3” thick. Spread with butter and sprinkle with sugar mixed with cinnamon. Starting on wide side, roll up snugly. Cut into twelve 1” slices. Place into one pan in circles, with rolls not quite touching. Brush with melted butter. Repeat with remaining dough. Cover lightly and let rise in warm place until double, about 1 hour.

Bake at 350° for 25-30 minutes.

Remove from oven; let stand 2-3 minutes, then loosen edges with a knife and turn upside down onto serving plate. Hold pan over rolls a minute for syrup to drain out on rolls. Serve warm nut-side-up.
These freeze well. Dough can be used for any sweet rolls.

Friday, December 11, 2009

Granola

From The Breakfast Book by Marion Cunningham, this is the simplest and most delicious granola I have ever made, or indeed, eaten. It has wowed those who have sampled it. The kicker is that it is fairly inexpensive to make. Unlike those store-bought granolas!

If you don't have easy access to mixed flakes, just use regular rolled oats (don't use quick oats though).

I have changed the flavoring around in various ways. The nutmeg seemed too perfumey to me so I switched to cinnamon. Equal parts of ginger and cinnamon have been quite tasty.

I always add the nuts with the flakes, just making sure to stir enough so they don't burn and they haven't yet. I've tried almonds, walnuts, and pecans. Almonds are my favorite nuts for this granola.

Granola
(about 5 cups)

4 cups mixed flakes (oats, rye, barley, wheat, rice)
Salt to taste (I never use any)
1 teaspoon nutmeg
1/2 cup honey
1/2 cup (1 stick) butter, melted
1 cup roughly chopped walnuts

Put the flakes in a large bowl and sprinkle with a little salt and the nutmeg. In a small bowl, stir the honey into the butter and blend well. Pour the honey syrup over the flakes and toss until they are well coated.

Spread the mixture on foil in a single layer on a baking sheet with edges. (I don't bother with the foil.) Bake in a preheated 300 degree oven for about 20 to 30 minutes, or until the flakes begin to look golden, turning the cereal every 10 minutes with a spatula or spoon. Be careful not to over bake. The flakes will seem a little sticky when done, but they will crisp up as they cool. (I stir occasionally while it is cooling to keep it from sticking.) Store in plastic bags or an airtight container. Use within a month or store in the freezer.

Wednesday, October 07, 2009

Lemon Ginger Muffins

This recipe, originally Bridge Creek Fresh Ginger Muffins, is from The Breakfast Book by Marion Cunningham. I served these for a book club meeting and was greeted with cries of delight mingled with demands for the recipe. Indeed, one friend's mother loved them so that she is being applied to daily for the recipe, where is that recipe!

Now that surely warms the cockles of any baker's heart.

Rather than type it in, which I have been trying to find time to do since that meeting three weeks ago, I found it at Williams Sonoma where it looks as if they slightly adapted it for one of their cookbooks, such as more than doubling the amount of ginger called for. I changed it back to Cunningham's amount. You can find a wonderful photo of the muffins here.

Update: I now have had a chance to compare Cunningham's original recipe with that from Williams-Sonoma and they tinkered with more than the ginger amount. I have restored the recipe to its original state.

These are fresh tasting and I agree with Cunningham who comments in the recipe that you can hardly ever have too much fresh ginger. My two-ounce measure went over the 1/4 cup measure mentioned below so I didn't worry.

Bridge Creek Fresh Ginger Muffins

(sixteen muffins)

1 2-ounce piece unpeeled fresh ginger

3/4 cup plus 3 tablespoons sugar [divided use]

2 tablespoons lemon zest (from 2 lemons), with some white pith

8 tablespoons (1 stick) butter, at room temperature
2 eggs
1 cup buttermilk

2 cups all-purpose flour
1/2 teaspoon salt
3/4 teaspoon baking soda
======================
Preheat an oven to 350ºF. Grease muffin tins.

Cut the unpeeled ginger into large chunks. If you have a food processor, process the ginger until it is in tiny pieces; or hand chop into fine pieces. (You should have about 1/4 cup. It is better to have too much ginger than too little.)

Put the ginger and 1/4 cup sugar in a small skillet or pan and cook over medium heat until the sugar has melted and the mixture is hot. Don't walk away from the pan -- this cooking takes only a couple of minutes. Remove from the stove and let the ginger mixture cool [which also happens fairly quickly].

Put the lemon zest and 3 tablespoons sugar in the food processor and process until the lemon peel is in small bits; or chop the lemon zest and pith by hand and then add the sugar. Add the lemon mixture to the ginger mixture. Stir and set aside.

Put the butter in a mixing bowl and beat a second or two, add the remaining 1/2 cup sugar, and beat until smooth.

Add the eggs and beat well.

Add the buttermilk and mix until blended.

Add the flour, salt and baking soda. Beat until smooth.

Add the ginger-lemon mixture and mix well.

Spoon the batter into the prepared muffin tins so that each cup is three-quarters full. Bake 15-20 minutes [until a toothpick inserted into the center of a muffin comes out clean]. Serve warm. [I served them a day old and they were delicious.]

Wednesday, February 11, 2009

Crunchy Cornmeal Waffles

These sturdy, tasty waffles came from The King Arthur Baking Book. 

We enjoy them on their own but that I have a sneaking liking for as the base for creamed tuna. You may raise your eyebrows in surprise at that, but creamed tuna is a family favorite and considered a high treat. I think the secret is in using albacore tuna, whole milk (instead of a lower fat product), and last ... but not least ... that pinch of nutmeg which is du rigeur for a good white sauce (well, one used for this purpose anyway).

It also helps when you have searched high and low as I did to find a waffle iron that makes four waffles at a time. So much faster than the regular one-waffle-per sort.

Step 1:
1-3/4 cups buttermilk
2 large eggs
5 tablespoons melted, cooled butter or vegetable oil

In a medium-sized mixing bowl, whisk together the buttermilk, eggs, and melted butter or oil.

Step 2:
1½ cups unbleached flour
1 cup yellow cornmeal
2 tablespoons sugar
2 teaspoons baking powder
1 teaspoon baking soda
1 teaspoon salt

In a separate bowl, blend together the dry ingredients, then quickly and gently combine the wet and dry ingredients. Let batter sit for 10 minutes to allow the cornmeal to soften.

Drop the batter by 2/3 cupfuls onto a hot waffle iron and bake until the waffle iron stops steaming.

Monday, November 19, 2007

Mashed Potato Dinner Rolls

This weekend I made a batch of these to have on hand for Thanksgiving. This recipe is from The Grass Roots Cookbook by Jean Anderson. I don't think it is in print any more so if you see a copy for sale, snap it up. It was the result of a "best cooks" series run by Family Circle, for which Anderson traveled thousands of miles and profiled many home cooks around the country known locally for their excellent cooking. This is one of the best cookbooks I know for representing regional cooking in the last days when such a thing was widespread and cooks vied to be the best. Every recipe I have tried from it has always been wonderful.

These rolls are no exception and my family loves them. They are the epitome of those soft, slightly sweet, buttery American rolls that are so difficult to find these days. Bakeries carry ciabiotta, authentic baguettes, fresh flour tortillas ... but a good American roll is hard to find.

I make these using leftover mashed potatoes. The fact that they are seasoned doesn't really make any difference to the rolls. Also, I have found it is good to leave the dough slightly sticky. Otherwise the rolls will be dry. I also tend to add 1-1/2 teaspoons malt powder (from King Arthur Flour) when I have it around.

If I am making them to serve to a large group, then I will bake them as described in the recipe. The result is very pretty, as our Japanese exchange student from long ago said, "Like a flower!" Otherwise, in a more utilitarian fashion, I make 48 balls of dough and put them 6-rolls x 8-rolls into a half-sheet jelly roll pan. (This is a large size pan that you can get from a restaurant supply company. I find them invaluable for cookie baking and much more.) I then freeze them in 6-roll squares to pull out for dinner.

Here is the recipe, straight from the book.

1/2 cup butter, at room temperature
1 cup hot, unseasoned mashed potatoes
1/2 cup sugar
2 teaspoons salt
1 package active dry yeast (That would be 2-1/2 teaspoons for those using bulk yeast ... also available from King Arthur flour. I double this amount if I am in a hurry.)
2 cups warm milk
2 eggs, lightly beaten
9-10 cups all-purpose flour (enough to make a soft but manageable dough)

  1. Combine butter, mashed potatoes, sugar and salt and stir until butter melts (if using leftover mashed potatoes, melt the butter and add it ... that warms up the potatoes). Cool mixture to 105 to 115 (or lukewarm).
  2. Sprinkle yeast over warm milk in a large mixing bowl (milk should feel comfortably warm when dropped on wrist). Stir until yeast dissolves.
  3. Add mashed-potato mixture to yeast; beat in eggs. Add the flour about 2 cups at a time, beating well to blend. Add only enough flour to give you a soft but workable dough -- it should not be so sticky that you cannot knead it.
  4. Turn dough onto a floured board and, with well-floured hands, knead about 5 minutes or until soft and springy (I do the mixing in my Kitchen Aid with the beater until it is "shaggy" and switch to a kneading hook for the kneading ... but for many years I made these by hand).
  5. Turn dough into a buttered bowl and brush the surface with melted butter. Cover with a clean dry cloth and let the dough rise in a warm, draft-free spot until doubled in bulk -- about 2 hours. (This dough takes somewhat longer than usual to rise because it contains only 1 package of yeast.)
  6. Punch dough down and let rest about 10 minutes. Turn onto a lightly floured board and knead lightly again -- about 2-3 minutes.
  7. Pinch off bits of dough and roll into balls about the size of golf balls. Arrange one layer deep, in concentric rings, in three well-greased 9-inch layer-cake pans (I also have used pie pans for this), spacing the rolls so that they do not quite touch one another (they will after they have risen). Cover pans with clean dry cloth, set in a warm, draft-free spot and again let rise until double in bulk -- about 1 hour or slightly longer.
  8. Bake the rolls in a very hot oven (450) for 10 minutes or until rolls are nicely browned and sound hollow when thumped with your fingers. Serve hot with plenty of butter.
  9. Note: Any rolls not eaten right away can be cooled to room temperature, then wrapped in foil (do not separate rolls) and frozen to enjoy later.

Tuesday, November 14, 2006

Yeast Raised Waffles

This is the first recipe I ever used for waffles and despite forays into other, more standard recipes, it remains our favorite. It is from an early Fanny Famer cookbook and Marion Cunningham has made sure that it has remained in cooking consciousness.

This comes from her Breakfast Book which I highly recommend. We are using it quite often as we return to our Sunday morning "special" breakfasts which Tom and I had done ever since we were newlyweds but had strayed from at some point in the busyness of parenthood. We alternate Sundays for choosing and making a special breakfast and the other person cleans up later.

Notes:
  • We never have the time to cook any leftover saved batter as Cunningham advises. Instead, I take a page from Eggo's book by cooking up whatever remains and popping them in the toaster on weekday mornings.
  • This made many more than 8 waffles for us.
1/2 cup warm water
1 package active dry yeast
2 cups milk, warmed
1/2 cup butter, melted
1 teaspoon salt
1 teaspoon sugar
2 cups all-purpose flour

2 eggs
1/4 teaspoon baking soda

Use a rather large mixing bowl -- the batter will rise to double its original volume. Put the water in the mixing bowl and sprinkle in the yeast. Let stand for 5 minutes, until yeast dissolves. Add the milk, butter, salt, sugar and flour to the yeast and beat until smooth and blended. Cover the bowl with plastic wrap and let stand overnight at room temperature.

Just before cooking the waffles, beat in the eggs, add the baking soda and stir until well mixed. The batter will be very thin. Cook on a very hot waffle iron (use about 1/3 cup batter per grid). Bake until the waffles are golden and crisp to the touch.

Note: If there is any leftover batter, store in a covered container in the refrigerator. It will keep for several days.

Yields 8 waffles
Tags:Food

Wednesday, November 08, 2006

Cream Biscuits

The Dallas Morning News' food section (free registration required) features biscuits of all sorts today as well as biscuit making tips.

However, I see that they missed the one essential recipe (similar to those I mentioned the other day) that means you can skip the tips and turn out fantastic biscuits every time with no trouble at all. That would be the recipe for cream biscuits, where heavy cream substitutes for the fat and liquid thus killing two birds with one stone. Not only that but you don't have to mess around with cutting in shortening or butter which I really detest for some reason.

These are from Beard on Bread by James Beard. Give them a try and you'll see what I mean.

Note: I never do the final step of dipping in melted butter. Also, I usually need between 1-1/2 and 2 cups of cream.

2 cups all purpose flour
1 Tbsp baking powder
2 tsps sugar
1 tsp salt
1 to 1-1/2 cups heavy cream
5 Tbsps melted butter

Preheat oven to 425F.

Put dry ingredients in a bowl, and fluff them together with a fork. Stirring constantly, slowly add 1 cup of the cream.

Gather it all together, adding a bit more cream if it goes saggy and dry.

When it holds together nicely, put it on a floured bread board, and knead it for about 60 seconds.

Pat it into a square about 1/2" thick. Cut into 12 squares, and dip each in the melted butter, dipping all sides of each biscuit. Put them on an ungreased baking sheet, about 2" apart.

Bake about 15 minutes, or until lightly browned. Serve hot.
Tags:Food

Friday, December 02, 2005

Cranberry Nut Bread

We had this every Christmas when I was growing up. Somehow it is a bit different (and, of course, I would say better) than the usual cranberry bread one finds. I haven't made it for years because of the general lack of interest in cranberries around my household ... but I may try it this year and just freeze slices for myself.

Step 1:
2 cups flour
1½ teaspoons baking powder
1 teaspoon salt
½ teaspoon soda
1 cup sugar
¼ cup shortening

Sift all together. Cut in shortening.

Step 2:
1 egg, beaten
¾ cup orange juice
2 cups cranberries
¹⁄₃ cup chopped nuts

Add eggs and juice, stirring only until mixed. Add nuts and cranberries.

Bake at 350° for 1¼ hours. Cool well before removing from pan. Let stand overnight before slicing. Very crumbly. Be careful slicing.

Tuesday, February 08, 2005

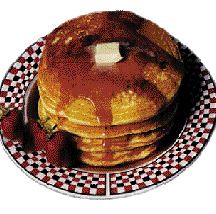
Pancakes

pancakes

After all that info about carnival food and Shrove Tuesday, what else makes sense but a great recipe for pancakes? This is from one of my favorite basic cookbooks, The New Doubleday Cookbook by Jean Anderson and Elaine Hanna.

Basic Pancakes

We double this to make breakfast for four in our family. I always make the Buttermilk Pancakes unless we happen to be out of buttermilk in which case the regular recipe is also delicious.

1 cup sifted flour
1/2 teaspoon salt
2 tablespoons sugar
2 teaspoons baking powder
1 egg, lightly beaten
3/4 cup milk
2 tablespoons cooking oil, melted butter or margarine

Preheat griddle over moderate heat while you mix batter or, if using an electric griddle, preheat as manufacturer directs. Sift flour, salt, sugar, and baking powder into a bowl or wide-mouthed pitcher. Combine egg, milk, and oil, slowly stir into dry ingredients, and mix only until dampened -- batter should be lumpy.

When a drop of cold water will dance on the griddle, begin cooking pancakes, using about 3 tablespoons batter for each, allowing plenty of space between them and spreading each until about 4" across.

Cook until bubbles form over surface, turn gently, and brown flip side. (Note: for extra-light and tender pancakes, turn before bubbles break and turn one time only.)

Stack 3-4 deep on heated plates and keep warm while cooking the rest. Serve as soon as possible with butter and maple syrup.

For Thinner Pancakes:
Add 2-3 extra tablespoons milk.

If Batter Has Stood Awhile:
Mix in about 1/4 teaspoon additional baking powder before cooking.

Buttermilk Pancakes:
Prepare as directed but reduce baking powder to 1 teaspoon, add 1/2 teaspoon baking soda, and use 1 cup buttermilk instead of sweet milk.

Whole Wheat Pancakes:
Prepare as directed, using 1/2 cup each unsifted whole wheat flour and sifted all-purpose flour; increase milk to 1 cup.

Nut Pancakes:
Prepare as directed and just before cooking fold in 1/2 cup coarsely chopped pecans, walnuts, almonds, or roasted peanuts.

Berry Pancakes:
Prepare batter as directed and just before cooking fold in 1/2 cup berries (any kind as long as they're small and well drained).

Cornmeal Pancakes:
(This is my variation. Can't remember where I picked it up.)

In a double batch of regular pancakes use 1-1/2 cups flour and 3/4 cup cornmeal.

Tuesday, November 16, 2004

Herbed Thanksgiving Stuffing

Somehow I had registered the idea that I had to do my Thanksgiving shopping this weekend but NOT the fact that meant I had to actually cook the Thanksgiving feast next week. It hadn't "clicked" somehow until Rose was talking about it last night. Thank heavens because that send me plunging into my files to make sure I had this recipe and didn't have to check the book out of the library to get it. Then, naturally, I had to share it with my blogging pals.

I realize it's a big claim to say this is the best stuffing ever. However, you have to realize that I'm always searching for the "best ever" way to make something I like and then I quit looking. I'm always going for taste and then simplicity. I have found my favorite biscuits, pumpkin pie, etc. this way. Not only does this stuffing taste like my ideal but it is made in the slow cooker. That's right, the slow cooker. Any Thanksgiving cooks know that oven space is at a premium for this meal and this solves many problems. You can gauge turkey time on an unstuffed bird, you have more room available for other things in the oven, it will stay warm in the slow cooker for a considerable time waiting for everything else to get done ... well, you get the picture. Without further ado, here is the recipe for Herbed Thanksgiving Stuffing. Enjoy!

From Rick Rodger's The Slow Cooker Ready and Waiting Cookbook.

Step 1:
8 tablespoons butter
1 large onion, chopped
3 medium celery ribs, chopped
Saute until softened.

Step 2?
1/2 cup chopped parsley
1-1/2 teaspoons rosemary
1-1/2 teaspoons thyme
1-1/2 teaspoons marjoram
1-1/2 teaspoons sage
1/2 teaspoon pepper
1-1/2 teaspoons salt
Remove onion mixture from heat and stir in above ingredients.

Step 3:
12 packed cups 1" cubes of stale Italian or French bread (about 1 pound)
2 cups turkey or chicken stock
Mix in bread cubes and toss with stock to moisten. Pack lightly into buttered slow cooker. Cover and cook on high for 1 hour. Reduce heat to low and slow-cook until heated through, 3-4 hours. The cooker will keep the dressing at serving temperature for up to 3 hours. I tend to like a moist stuffing and probably would use a bit more stock than above which makes a drier stuffing ... although it's darn good for sopping up gravy that way!

Variations:
Sausage Stuffing - Cook 1 pound bulk pork sausage. Drain. Stir into stuffing during the last hour of cooking.

Mushroom Stuffing: Saute 1-1/2 pounds sliced mushrooms in 4 tablespoons butter until mushrooms have given off liquid and are beginning to brown. Stir into stuffing during last hour of cooking.

Saturday, October 16, 2004

Skillet Cornbread

For a few days last week it was finally more like fall here. Now it's hot again but then we had chilly mornings, driving to work with the windows open, simply beautiful days. This summer was much more bearable than usual but I had given up doing anything that would heat up the kitchen. Fall is when I begin making one of the girls' favorites, Skillet Cornbread. It isn't the sweet, Northern kind I grew up on ... the kind you get when you use Jiffy Mix. This is classic Southern cornbread made with buttermilk and no sugar, in a cast iron skillet.

I know this recipe is one of James Villas' mother but am not sure which cookbook I got it from. I think it was from My Mother's Southern Kitchen. The original also had bacon fat but none of us liked the taste so I use straight shortening.

NOTE: I now use the variation at the bottom of the recipe, which I adapted from the main recipe.

Step 1:
1-1/2 cups white cornmeal
3 tablespoons flour
1 teaspoon baking soda
1 teaspoon salt
Preheat oven to 475°. Combine ingredients.

Step 2:
1-3/4 cups buttermilk
1 large egg
Add to dry ingredients, combine well.

Step 3:
2 tablespoons shortening
Melt shortening in a 9-1/2" cast iron skillet. Pour hot fat into batter, stir well and pour batter back in skillet.

Bake for 20 minutes. Turn out onto large plate, cut into wedges and enjoy!

Cooking Variation:
Butter a 9” cake pan, bake at 450°, use 2 tablespoons vegetable oil instead of shortening.

Cheese Pizza - 12" Rounds or Pan Style

 These recipes are from Pizza: Any Way You Slice It by Charles & Michele Scicolone. These are my go-to dough, sauce, and cooking variat...