 For those who were drooling over Hannah's Birthday Cake, here is the recipe from Time Life Foods of the World: The Cooking of Vienna's Empire. As I mentioned I didn't make the top caramel layer but just frosted it all with the chocolate filling. No one complained. However, I am giving the complete instructions here. This may look daunting but is simple although it does require a candy thermometer ... and enough time to not rush through anything.
The Cake
1/2 pound unsalted butter, softened
1 cup granulated sugar
4 eggs, lightly beaten
1-1/2 cups all-purpose flour
1 teaspoon vanilla extract
Preheat oven to 350 F. Cream butter and sugar by beating them together against the side of a mixing bowl with a wooden spoon. Beat in the eggs, then stir in the flour and the vanilla extract. Continue to stir until the mixture becomes a smooth, firm batter.
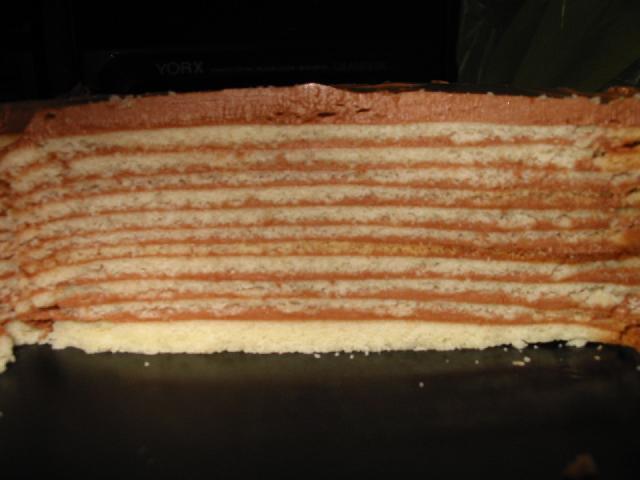
(Classic layer technique from cookbook)
With a pastry brush or paper towel, butter the underside a 9" layer cake pan, then dust it with flour. (I can never get 7 layers out of the 9" pan so I always use 8" pans.) Strike the pan against the edge of a table to knock off the excess flour. With a metal spatula, spread the batter as evenly as possible over the underside of the pan to a thickness of 1/8". Bake in the middle of the oven 7 to 9 minutes, or until the layer is lightly browned around the edges.
Remove from the oven and scrape off any batter that has dribbled down the sides of the pan. Loosen the layer from the pan with a spatula, put a cake rack over it and invert. Wipe the pan with a paper towel, butter and flour it again and repeat the baking process with more batter. (You may, of course, bake as many layers at a time as you have cake pans.) Continue until all the batter is used. You should have 7 exactly matching layers.
(Improved technique for easier cake layer execution as well as increased number of layers -- thanks to Rich for this.)
I just get a suitable pan or bowl to mark an 8-9" circle and two cookie sheets.
Butter and flour the cookie sheet, then turn the bowl upside down, place it on, and give it a slight twist to mark a circle in the flour.
Then, with a spatula (I have a fairly rigid plastic one that I fond works better for this than rubber ... metal is even more accurate), place a dollop of cake batter in the middle of the circle, and spread it out with the spatula. Just keep spreading with a circular motion until the circle is filled.
(I find placing the initial dollop with a bit of a thump helps it stick so I can spread it.)
Then - and this is the trick - keep using the spatula to scrape the layer down to a uniform thickness. You can get it very thin this way! Just use the same circular spreading motions, but return what sticks to the spatula to the batter bowl.
The last layer is a bit tricky, as you don't have much excess material to work with, but you've just had practice, so it's not too bad. It'll end up being a bit thicker than the others, and makes a good bottom layer.
The layers won't exactly match, but they'll be quite close. You can cover that up with the filling and break off any bits that stick out more than they should. The result looks and tastes fine!
By keeping two cookie sheets going, I can prepare one while the other bakes, thereby getting one layer done every 8 minutes.
Actually, it takes be about 10-11 minutes per layer, and if you make them thin, 7 minutes is all the cooking time they need. so the last one has to come out a few minutes before the next one is ready to go in.
The other advice I have is to lay each layer on a perfectly flat surface while it cools, before stacking it. This reduces the amount of ripple in the layers tremendously.
And if you make more layers, you have to use thinner layers of filling (obviously), so it helps to press each layer flat with a small cutting board or something after placing it on.
The Filling
1-1/3 cups sugar
1/4 teaspoon cream of tartar
2/3 cup water
8 egg yolks
1/2 cup dark unsweetened cocoa
2 teaspoons vanilla extract
2 cups (1 pound) unsalted butter, softened
In a small saucepan, combine the sugar, cream of tartar and water. Stir over low heat until the sugar is completely dissolved, then turn the heat to moderately high and boil the syrup without stirring until, if tested, it registers 238 degrees on a candy thermometer, or until a drop of the syrup in cold water forms a soft ball.
Meanwhile, in a mixer, or by hand with a rotary or electric beater, beat the 8 egg yolks for 3 or 4 minutes, or long enough to thicken them and lighten them somewhat in color.
Pour the hot syrup into the eggs, continuing to beat as your pour in the syrup in a slow, steady stream. If you are using a mixer, beat at medium speed until the mixture cools to room temperature and changes to a thick, smooth cream. This usually takes from 10 to 15 minutes. (If you are beating by hand, set the mixing bowl in a pan of cold water to hasten the cooling and add the syrup a little at a time.)
Continue to beat until the cream is cook, thick and smooth, then beat in the cocoa and vanilla extract. Last, beat in the butter, adding it in small pieces until it is all absorbed. Refrigerate while you make the glaze.
The Glaze
2/3 cup sugar
1/3 cup water
First, place the most attractive of the cake layers on a cake rack set on a jelly-roll pan, then mix the sugar and water together in a small heavy saucepan. Without stirring, cook until the sugar dissolves, boils and begins to darken in color. Swirling the pan, continue to boil until the caramel becomes a golden brown, then pour it over the layer. With a buttered knife, quickly mark the glaze into 16 equal wedges, cutting nearly, but not quite, through to the bottom of the glaze. This mirrorlike layer will be the top of the Torte.
Assembling the Torte
Place a cake layer on a serving plate and, with a metal spatula, spread chocolate filling over it to a thickness of 1/8 inch, then top with another cake layer. Continue with the other layers, finishing with a layer of filling and the glazed top. Use the rest of the chocolate filling to cover the sides of the cake, smoothing it on with a spatula and refrigerate. To serve, slice along the lines marked in the glaze.
Tags:Food

No comments:
Post a Comment