Showing posts with label Chocolate. Show all posts

Friday, August 28, 2020

Chocolate Mousse

Hannah asked for Chocolate Mousse for her birthday and I automatically pulled down The Silver Palate Cookbook which has a whole section of them. I've made the Lime Mousse many times but never tried this (which is actually in the chocolate section - so these ladies are all about mousse and put them everywhere).

It was the deepest, darkest, most luscious mousse ever. Also rather solid, not ethereal like some you might think of. The recipe says it serves 8, but I'd say 10-12.

It was really easy, worked like a charm, and, as I said above, delicious.

INGREDIENTS

1-1/2 pounds semisweet chocolate chips
1/2 cup prepared espresso coffee
1/2 cup Grand Marnier
4 egg yolks
2 cups heavy cream, chilled
1/4 cup sugar
8 egg whites
Pinch of salt
1/2 teaspoon vanilla extract


METHOD

  1. Melt the chocolate chips in a heavy saucepan over very low heat, stirring; add the espresso coffee, then stir in the Grand Marnier. Let cool to room temperature.
  2. Add the egg yolks, one at a time, beating thoroughly after each addition.
  3. Whip 1 cup of the cream until thickened, then gradually beat in the sugar, beating until stiff. Beat the egg whites with salt until stiff. Gently fold the egg whites into the cream.
  4. Stir about one third of the cream and egg mixture thoroughly into the chocolate mixture. Then scrape the remaining cream and egg mixture over the lightened chocolate base and fold together gently. Pour into 8 individual dessert cups or a serving bowl. Refrigerate for 2 hours, or until set.
  5. At serving time, whip the remaining cup of cream until thickened, add the vanilla, and whip to soft peaks. Top each portion of the mousse with a share of the cream.

Wednesday, June 15, 2016

Supremes

This recipe is from Maida Heatter's Cookies. She says: These are rich walnut-oatmeal bars with a baked-in sweet chocolate filling. The recipe gives a large yield and the cookies are generally best stored in the refrigerator and served cold.

They're all that and more. Everyone just loves these, they make a ton, and they freeze well. What's kind of funny is that I've never cared for them that much. But I'm the only one, believe me.

Supremes

Makes 32 to 48 large or 64 small bars

2-1/2 cups flour
1 teaspoon baking soda
1/2 teaspoon salt
8 ounces (2 sticks) butter
1 teaspoon instant coffee
1 teaspoon vanilla extract
2 cups light brown sugar, firmly packed
2 eggs
3 cups old-fashioned or quick-cooking oatmeal
7 ounces (2 cups) walnuts, cut or broken into medium pieces

Chocolate Filling:

1 15-oz can sweetened condensed milk
12 ounces semisweet chocolate, cut into small pieces
2 tablespoons butter
Pinch of salt
1 teaspoon vanilla


Adjust a rack one-third up from the bottom of the oven and preheat to 350°. Butter a 15-1/2 x 10-1/2 x 1-inch jelly-roll pan.

Sift together the flour, baking soda, and salt and set aside. In the large bowl of an electric mixer cream the butter. Add the coffee, vanilla, and sugar. Beat well. Add the eggs and beat well. On low speed gradually beat in the sifted dry ingredients and then the oatmeal, scraping the bowl with a rubber spatula as necessary. Finally mix in 1 cup of the walnuts (reserve the remainder for the topping).

Remove and reserve 2 cups of the dough. Place the remainder by large spoonfuls over the bottom of the buttered pan. With well-floured finger-tips press all over to make a smooth, even layer. Set aside and prepare the following filling.

Chocolate Filling:

Place the condensed milk, chocolate, butter, and salt in the top of a large double-boiler over hot water on moderate heat. Stir occasionally until the chocolate and butter are melted and the mixture is smooth. (I live on the wild side by just using a regular pan and stirring continually over low heat.)

Remove the top of the double-boiler from the heat and stir in the vanilla. Pour the warm chocolate mixture over the bottom oatmeal layer and spread evenly. Place the reserved oatmeal mixture by small spoonfuls over the chocolate, letting the chocolate show through between the spoonfuls. Do not spread smooth. Sprinkle the reserved cup of walnuts evenly over the top.

Bake for 25 minutes or until the top is golden brown. Reverse the pan front to back once toward the end of baking to insure even browning. (I also don't reverse the pan. A daredevil, that's me.) The top mounds will flatten slightly but they will not run together to cover the chocolate.

Cool completely in pan at room temperature (not in the refrigerator) for several hours. Cut into bars. If cookies are too soft to cut, place in the refrigerator for a few minutes before cutting.

Thursday, May 26, 2011

The Amazing Chocolate Pie

For my birthday, I had a hankering for chocolate pie. Specifically, I was curious about the technique mentioned in the most recent Cooking Light which combines some melted chocolate with the chocolate crumbs for the crust.

Rose volunteered to make the pie and was astonished by how easily it went together. She and a friend had a little pie business during their freshman year of college and Rose made many a chocolate pie during that time. She says that she never had a pie recipe work so well or be so quick as this.

This was an amazing pie. A deep, rich chocolate flavor; perfect texture with no lumps; just firm enough. Truly a superior dessert experience.

We did take two liberties with the recipe. We had whole milk and so used that instead of 1% milk. And we used real whipped cream instead of fat-free Cool Whip. Also, I didn't have any raspberries. They would have looked pretty but they weren't missed.

Cooking Light named this Rich Chocolate Pudding Pie. We call it ...

The Amazing Chocolate Pie

YIELD: 10 servings (serving size: 1 pie slice, about 1 tablespoon berries, and 1 tablespoon whipped topping)
HANDS-ON: 20 MINUTES
TOTAL: 4 HOURS, 45 MINUTES

Ingredients

CRUST
30 chocolate wafers (such as Nabisco's Famous Chocolate Wafers)
3 ounces bittersweet chocolate, melted
1 tablespoon canola oil

FILLING
3/4 cup sugar
1/4 cup cornstarch
1/4 cup unsweetened cocoa
1/4 teaspoon salt
1 3/4 cups 1% low-fat milk, divided (we used whole milk)
2 large egg yolks
4 ounces bittersweet chocolate, finely chopped
1 tablespoon white rum
1/2 cup fresh raspberries
10 tablespoon fat-free frozen whipped topping, thawed (we used whipped cream*)

Preparation
1. To prepare crust, place wafers in a food processor; process until finely ground. Add 3 ounces melted chocolate and oil; process until blended. Press into bottom and up sides of a 9-inch pie plate. Freeze the 15 minutes or until set.

2. To prepare the filling, combine sugar, cornstarch, cocoa, and salt in a large saucepan; stir with a whisk. Add half of milk and 2 yolks; stir with a whisk until smooth. Stir in the remaining milk. Cook over medium heat for 5 minutes or until thick and bubbly, stirring constantly. Remove from heat. Add 4 ounces chocolate, and stir until smooth. Stir in rum. Pour filling into prepared crust. Cover with plastic wrap; chill 4 hours or until set. Serve with raspberries and whipped topping.

* To whip cream, we poured about a cup of heavy cream into a bowl, sprinkled in a spoonful or so of powdered sugar, picked up a whisk and whisked it all together briskly until the cream held its shape. Easy as ... wait for it ... pie!

Wednesday, January 28, 2009

Hot Cocoa

Last night an ice storm blew through. Dallas being what it is, essentially a warm weather spot, this means that the town has shut down. People left work early yesterday, schools are closed, no traffic can be heard on the main road near our house, businesses will open late. Yes, I know. To anyone who has lived in harsher climes, this sounds ridiculous. However, when you live with weather that is in the 70s in April, hits two to three weeks of consecutive over 110 degree weather in August and can have you wearing shorts at Thanksgiving and Christmas, that is how it goes.

This is as wintery as it may get so it is time to break out the cocoa in celebration. I am not talking about those powdered mixes. Nor yet am I going too far on the other side with decadent melted chocolate. We're talking about true all-American cocoa of the sort that my own mother whipped up regularly when I was growing up in Kansas.

I remember reading a few years ago that someone, maybe America's Test Kitchen, discovered that water intensifies chocolate's flavor. News flash, folks. That already was known as you can see if you look at this recipe from one of my favorite American cookbooks, The New Doubleday Cookbook by Jean Anderson and Elaine Hanna.

Be sure to use whole milk, especially since this is using water first in the recipe which will bring out the flavor of the chocolate. Also, if you have a good rich cocoa that helps the drink, of course. I grew up on Hershey's cocoa like the rest of America, but have since found Penzey's cocoa which is a delectably dark cocoa. They recommend Dutch cocoa for cocoa but I only keep natural on hand. It works just fine.

Hot Cocoa
1 serving

1 tablespoon cocoa
1 tablespoon sugar
Pinch salt
1/3 cup water
2/3 cup milk

Mix cocoa, sugar, and salt in a small saucepan, slowly stir in water. Heat and stir over moderately low heat until mixture boils, then boil slowly, stirring constantly, 2 minutes. Add milk and heat to scalding [almost boiling] but do not boil.

Cocoa for a Crowd
12 servings

3/4 cup cocoa
3/4 cup sugar
1/2 teaspoon salt
1 quart warm water [4 cups]
2 quarts milk

Make as above, except take 8 minutes to incorporate water and bring to a boil.

Monday, January 07, 2008

Cheesecake Bombs

It really isn't fair to start off the New Year with a recipe like this is it? Unless your goal is deliciousness!

This comes from The Anchoress who was good enough to share it a few days ago. I haven't had a chance to try it but I have a movie night group meeting in a couple of weeks and I think I know just what would be perfect to make ahead and take! Thanks Anchoress!

1 pound cream cheese, softened
3/4 cup sugar
3 large eggs
2 teaspoons pure vanilla extract
1/3 cup whipping cream
Tiniest pinch salt

12 ounces chocolate, melted

1. Preheat oven to 350°F. Line a baking sheet with parchment paper. Line an 8x8 or 9x9-inch pan with parchment paper or aluminum foil and spray with nonstick cooking spray. Place pan on prepared baking sheet.

2. Mix Cheesecake Batter ingredients until smooth. Pour into pan. Bake until set, about 30 minutes. Cool well in fridge. Cut into small squares (24 to 32). Place squares on a parchment paper-lined baking sheet and freeze 1 to 2 hours.

3. Meanwhile, melt chocolate.

4. To finish Cheesecake Bombs, using a fork to assist, dip and turn each frozen cheesecake portion in chocolate. Let set on parchment paper-lined baking sheet. Freeze briefly to set and then place in confectionery paper holders, if desired. Seal in a zip-top freezer bag and freeze up to 2 months. Serve frozen or thaw slightly and serve chilled.

Monday, August 20, 2007

Chocolate Festival Cake

One person took a bite and said, "Peanut butter! I love chocolate and peanut butter!"

Another sampled his slice and said, "But it isn't just peanut butter and chocolate. There's some other flavor in there."

I told them, "Bananas. It has bananas in it."

Yet a third person said, "Is this technically difficult to make? Because I really want the recipe."

The first two people chorused, "Us too. We want that recipe."

What makes this an unusual conversation is that this was at a birthday party and the speakers were all college sophomores. If you don't have any college aged kids, just think back to your own late teens to realize how unlikely this request for a recipe actually is, to say nothing of the entire conversation. Needless to say, this cake was popular.

Hannah's friend, Jenny, picked out this cake from Maida Heatter's Cakes. I had never seen a cake with such a combination of dominant flavors: chocolate, peanut butter, and bananas. We were all intensely curious to see what it was like.

It is hard to describe the taste, as you really can taste all those dominant ingredients, however, as reported above it was a huge success. Give it a try.

Notes:
Heatter is well known for exhaustive instructions in her recipes. I revised a few of her technique notes for simplicity's sake ... and have adapted the recipe below to reflect those changes.

The icing contains a raw egg which would have worried me about salmonella if all I listened to were the sound bytes of major media. Here is a link which talks about food risks and raw eggs, which are much slighter than you would know from the way it is generally presented.

Serves 24

For the cake:
Step 1:
3 cups (12 ounces) all-purpose flour
1 tablespoon baking powder
2 teaspoons baking soda
1 teaspoon salt

Preheat oven to 350. Prepare 10 x 4" tube pan by buttering pan and then dusting all over with unsweetened cocoa powder. Tap excess cocoa out of pan and set aside.

Combine above dry ingredients and set aside.

Step 2:
8 ounces (2 sticks) unsalted butter
1 cup smooth peanut butter
1 tablespoon vanilla extract
1 pound (2-1/4 cups, packed) dark brown sugar
4 ounces semisweet chocolate, melted and cooled
1 cup (about 2) finely mashed, fully ripened bananas
6 eggs
1 cup strained unsweetened cocoa powder (preferably Dutch-process)

In the large bowl of an electric mixer, beat the butter until soft. Beat in the peanut butter and vanilla, then the sugar, scraping bowl as necessary with a rubber spatula. Next, mix in melted chocolate, then bananas, and then the eggs, one at a time, beating until incorporated after each addition. On lowest speed, add cocoa, still scraping bowl as necessary, and beat until smooth.

Step 3:
1-1/4 cups milk

On low speed, beating until smooth after each addition, gradually add about a third of sifted dry ingredients, the half of milk, then another third of dry ingredients, then remaining milk, and then remaining dry ingredients.

Turn mixture into prepared pan. Briskly rotate the pan a bit, first in one direction, then another, to smooth the top.

Bake for 1 hour, then cover the top loosely with foil to prevent overbrowning, and continue to bake for an additional 25 -30 minutes until a cake tester gently inserted into the cake comes out clean (total baking time 1 hour, 25-30 minutes). The top of the cake will crack during baking.

Cool in the pan on a rack for 20 minutes. Then cover with another rack, turn the pan and rack over, remove the pan and let the cake cool upside down on the rack.

For the icing:
16 ounces milk chocolate, broken up
2 ounces unsweetened chocolate, chopped coarsely
4 ounces (1 stick) unsalted butter, cut into 1/2" pieces
1 egg
12 ounces (1-1/2 cups) smooth peanut butter

Melt both chocolates. Add butter a few pieces at a time, stirring with a wooden spoon until smooth.

In the large bowl of an electric mixer, beat the egg just to mix, then add the peanut butter and the chocolate mixture (which can be warm or cool) and beat until very smooth. As this mixture cools it will thicken; you might want to chill it quickly by putting it in the freezer or by placing the bowl in a larger bowl of ice and water. Or just let it stand a while. When it is thick enough to hold its shape beat it again for a moment.

This is a lot of icing and makes a thick layer. Spread it first on the sides and then on the top of the cake. With a long, narrow metal spatula, smooth the sides first and then the top.

Tuesday, March 27, 2007

"“But CF,” you are asking. “If there were no chocolate chips, how did you make those chocolate chip cookies that tasted like fish?”

I wasn't nearly as interested in a lack of chocolate chips as I was in how those cookies tasted like fish. (Like Class Factotum, I know how to make chocolate chips ... yes, I'm that smart.)

However, the "fishy" part, which I was more interested in avoiding than achieving as you can imagine ... you can get the scoop on that right here.

Tuesday, March 06, 2007

Chocolate Cheesecake

When we had our company last weekend I made a Nutty Chocolate Cream Cheese Pie which the Dallas Morning News had printed from Paula Lambert's new cookbook.

However, it was much too intense, even for Tom, which is really saying something. He, Rose and I all agreed that we'd have preferred this Chocolate Cheesecake. I no longer remember where I got the recipe but it is really a winner. Simple, chocolate and cheesecake at the same time, and serves a lot of people. The slices can be small. It is rich.

Step 1:
1-1/2 cups chocolate cookie crumbs
8 tablespoons unsalted butter, melted
4 tablespoons sugar

Make the crust: In a small bowl stir together all ingredients. Press mixture onto the bottom of a 10” springform pan. Make the filling (below).

Step 2:
12 ounces chocolate chips
1-1/2 sticks unsalted butter

Melt chocolate and butter, stirring until mixture is smooth.

Step 3:
1 cup sour cream at room temperature
1 teaspoon vanilla

Stir in sour cream and vanilla and let cool.

Step 4:
3 large eggs
1 cup sugar

Beat eggs and sugar together until mixture is thick and pale and forms a ribbon when beaters are lifted.

Step 5:
3 8-ounce packages cream cheese, softened

Beat in cream cheese until smooth.

Step 6:
1 cup chopped pecans

Stir in chocolate mixture and fold in pecans.

Step 7:
Pour the filling into the prepared crust and bake in the middle of a preheated 325° oven for 1 hour or until just set. It may fall in the middle. Cool in the pan on a rack, chill overnight, covered loosely and remove the side of the pan.

NOTE: This can be made in a 8½” springform pan by halving the crust ingredients and baking for two hours at 325°.

Saturday, January 20, 2007

Quick, Easy and Delicious

From Ron Rolling ... mmmm, eggnog and chocolate ...

About five years ago, when I was working for the wholesale magazine distributor, we had a pot-luck lunch shortly before Christmas. The company provided the main course; the employees were to bring salads and desserts. I opted to make a chocolate pie (pre-made graham cracker shell and instant pudding; I am a bachelor, after all).

Here's the twist: Instead of milk, I used eggnog in the same proportion as directed.

A wire whisk or small blender works well to get the consistency.

Someone commented to me upon sampling that it had a taste of cappachinno (I would guess the nutmeg in the eggnog).

And, yes, you will have to go to confession after eating it. It is sinful.
Tags:Food

Monday, December 04, 2006

Doboschtorte - New and Improved Technique

I'm reposting this to share the improved technique for getting even cake layers with less fuss. Much thanks to Rich for the photo and all the scoop.
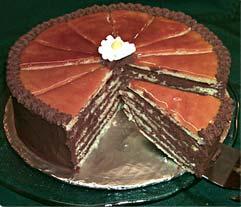
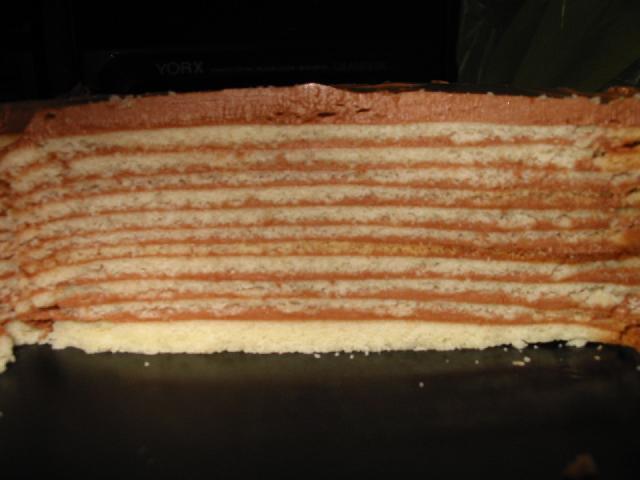
For those who were drooling over Hannah's Birthday Cake, here is the recipe from Time Life Foods of the World: The Cooking of Vienna's Empire. As I mentioned I didn't make the top caramel layer but just frosted it all with the chocolate filling. No one complained. However, I am giving the complete instructions here. This may look daunting but is simple although it does require a candy thermometer ... and enough time to not rush through anything.

The Cake
1/2 pound unsalted butter, softened
1 cup granulated sugar
4 eggs, lightly beaten
1-1/2 cups all-purpose flour
1 teaspoon vanilla extract

Preheat oven to 350 F. Cream butter and sugar by beating them together against the side of a mixing bowl with a wooden spoon. Beat in the eggs, then stir in the flour and the vanilla extract. Continue to stir until the mixture becomes a smooth, firm batter.

(Classic layer technique from cookbook)
With a pastry brush or paper towel, butter the underside a 9" layer cake pan, then dust it with flour. (I can never get 7 layers out of the 9" pan so I always use 8" pans.) Strike the pan against the edge of a table to knock off the excess flour. With a metal spatula, spread the batter as evenly as possible over the underside of the pan to a thickness of 1/8". Bake in the middle of the oven 7 to 9 minutes, or until the layer is lightly browned around the edges.

Remove from the oven and scrape off any batter that has dribbled down the sides of the pan. Loosen the layer from the pan with a spatula, put a cake rack over it and invert. Wipe the pan with a paper towel, butter and flour it again and repeat the baking process with more batter. (You may, of course, bake as many layers at a time as you have cake pans.) Continue until all the batter is used. You should have 7 exactly matching layers.

(Improved technique for easier cake layer execution as well as increased number of layers -- thanks to Rich for this.)

I just get a suitable pan or bowl to mark an 8-9" circle and two cookie sheets.

Butter and flour the cookie sheet, then turn the bowl upside down, place it on, and give it a slight twist to mark a circle in the flour.

Then, with a spatula (I have a fairly rigid plastic one that I fond works better for this than rubber ... metal is even more accurate), place a dollop of cake batter in the middle of the circle, and spread it out with the spatula. Just keep spreading with a circular motion until the circle is filled.

(I find placing the initial dollop with a bit of a thump helps it stick so I can spread it.)

Then - and this is the trick - keep using the spatula to scrape the layer down to a uniform thickness. You can get it very thin this way! Just use the same circular spreading motions, but return what sticks to the spatula to the batter bowl.

The last layer is a bit tricky, as you don't have much excess material to work with, but you've just had practice, so it's not too bad. It'll end up being a bit thicker than the others, and makes a good bottom layer.

The layers won't exactly match, but they'll be quite close. You can cover that up with the filling and break off any bits that stick out more than they should. The result looks and tastes fine!

By keeping two cookie sheets going, I can prepare one while the other bakes, thereby getting one layer done every 8 minutes.

Actually, it takes be about 10-11 minutes per layer, and if you make them thin, 7 minutes is all the cooking time they need. so the last one has to come out a few minutes before the next one is ready to go in.

The other advice I have is to lay each layer on a perfectly flat surface while it cools, before stacking it. This reduces the amount of ripple in the layers tremendously.

And if you make more layers, you have to use thinner layers of filling (obviously), so it helps to press each layer flat with a small cutting board or something after placing it on.

The Filling
1-1/3 cups sugar
1/4 teaspoon cream of tartar
2/3 cup water
8 egg yolks
1/2 cup dark unsweetened cocoa
2 teaspoons vanilla extract
2 cups (1 pound) unsalted butter, softened

In a small saucepan, combine the sugar, cream of tartar and water. Stir over low heat until the sugar is completely dissolved, then turn the heat to moderately high and boil the syrup without stirring until, if tested, it registers 238 degrees on a candy thermometer, or until a drop of the syrup in cold water forms a soft ball.

Meanwhile, in a mixer, or by hand with a rotary or electric beater, beat the 8 egg yolks for 3 or 4 minutes, or long enough to thicken them and lighten them somewhat in color.

Pour the hot syrup into the eggs, continuing to beat as your pour in the syrup in a slow, steady stream. If you are using a mixer, beat at medium speed until the mixture cools to room temperature and changes to a thick, smooth cream. This usually takes from 10 to 15 minutes. (If you are beating by hand, set the mixing bowl in a pan of cold water to hasten the cooling and add the syrup a little at a time.)

Continue to beat until the cream is cook, thick and smooth, then beat in the cocoa and vanilla extract. Last, beat in the butter, adding it in small pieces until it is all absorbed. Refrigerate while you make the glaze.

The Glaze
2/3 cup sugar
1/3 cup water

First, place the most attractive of the cake layers on a cake rack set on a jelly-roll pan, then mix the sugar and water together in a small heavy saucepan. Without stirring, cook until the sugar dissolves, boils and begins to darken in color. Swirling the pan, continue to boil until the caramel becomes a golden brown, then pour it over the layer. With a buttered knife, quickly mark the glaze into 16 equal wedges, cutting nearly, but not quite, through to the bottom of the glaze. This mirrorlike layer will be the top of the Torte.

Assembling the Torte
Place a cake layer on a serving plate and, with a metal spatula, spread chocolate filling over it to a thickness of 1/8 inch, then top with another cake layer. Continue with the other layers, finishing with a layer of filling and the glazed top. Use the rest of the chocolate filling to cover the sides of the cake, smoothing it on with a spatula and refrigerate. To serve, slice along the lines marked in the glaze.
Tags:Food

Wednesday, October 11, 2006

When You Don't Have Any Gianduja

A.K.A. Nutella. Mmmm, Nutella. This is such a favorite in our household with the girls that a spoonful often is dessert. After converting a few of Hannah's friends a jar or two of Nutella made a perfect going-away gift when they left for college.
Substitute 1 cup gianduja with:
  • 1 cup creamy peanut butter (omits chocolate and hazelnut flavors)
  • 3 ounces or 1/2 cup milk chocolate and 1/2 cup creamy peanut butter, cashew butter, or almond butter; melt in a double boiler and stir until smooth.
Tags:Food

Monday, June 19, 2006

Thick and Chewy Chocolate Chip Cookie Bars

From Cook's Illustrated, boy oh boy are these good!

There are tedious instructions for lining the pan with foil to make a sort of sling to lift the cookies out after they have cooled. I'm not sure why because I just sprayed the pan with cooking spray and cut them after they cooled right in the pan. They came out with no problems at all.

Enjoy!

You can substitute white, milk chocolate, or peanut butter chips for the semi- or bittersweet chips called for in the recipe. In addition to chips, you can flavor the dough with 1 cup of nuts, raisins, or shredded coconut.
Makes 24 (2-inch) square cookies

2 1/8 cups bleached all-purpose flour (10 1/2 ounces)
1/2 teaspoon table salt
1/2 teaspoon baking soda
12 tablespoons unsalted butter (1 1/2 sticks), melted and cooled slightly
1 cup light brown sugar (7 ounces)
1/2 cup granulated sugar (3 1/2 ounces)
1 large egg
1 large egg yolk
2 teaspoons vanilla extract
2 cups chocolate chips or chunks (semi or bittersweet)


1. Heat oven to 325 degrees. Adjust oven rack to lower-middle position. Cut 18-inch length foil and fold lengthwise to 8-inch width. Fit foil into length of 13 by 9-inch baking pan, pushing it into corners and up sides of pan; allow excess to overhang pan edges. Cut 14-inch length foil and fit into width of baking pan in same manner, perpendicular to first sheet (if using extra-wide foil, fold second sheet lengthwise to 12-inch width). Spray foil-lined pan with nonstick cooking spray.

2. Mix flour, salt, and baking soda together in medium bowl; set aside.

3. Whisk melted butter and sugars in medium large until combined. Add egg, egg yolk, and vanilla and mix well. Using rubber spatula, fold dry ingredients into egg mixture until just combined; do not overmix. Fold in chips and turn batter into prepared pan, smoothing top with spatula.

4. Bake until top is light golden brown, slightly firm to the touch, and edges start pulling away from sides of pan, 27 to 30 minutes. Cool on wire rack to room temperature. Remove bars from pan by lifting foil overhang and transfer to cutting board. Cut into 2-inch squares and serve.
Tags:Food

Thursday, June 08, 2006

Chocolate Mint Cake


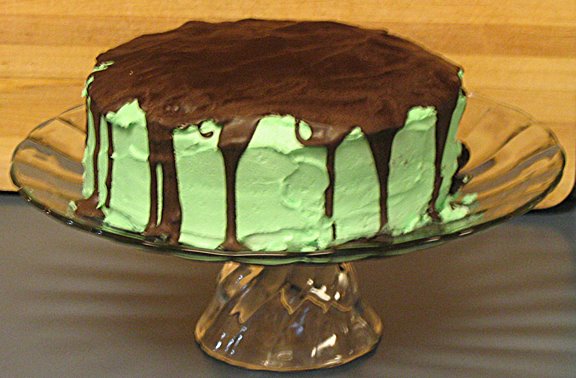
Can you believe I actually remembered to take a photo of my birthday cake? Of course, it only took me two weeks to get it posted with the recipe ... but better late than never (my motto as of late).

I didn't have the original recipe, which my mother says was from a Better Home & Garden cookbook. I recreated it using layers of Easy Chocolate-Buttermilk Cake and then frosted them with this.

MINT BUTTERCREAM FROSTING
From The Cake Mix Doctor. There is not a bad frosting recipe in this book. They are all homemade as opposed to the cake recipes which fix up cake mixes. I don't use the cake recipes from this, preferring the texture of home made cake, but I do use it for inspirations on cake/frosting pairings. This is the basic buttercream frosting with mint extract substituted for the vanilla.

8 tablespoons (1 stick) butter at room temperature
3-3/4 cups confectioners' sugar, sifted
3-4 tablespoons milk
1/2 to 1 teaspoon peppermint extract
Green food coloring

Place the butter in a large mixing bowl. Blend with an electric mixer on low speed until fluffy, 30 seconds. Stop the machine and add the confectioners' sugar, 3 tablespoons of milk, and vanilla. Blend with the mixer on low speed until the sugar is incorporated, 1 minute. Increase the speed to medium and beat until light and fluffy, 1 minutes more. Blend in up to 1 tablespoon milk if the frosting seems too stiff. If you like, tint the frosting green ... I do like as you can see from the photo.

CHOCOLATE TOPPING
4 ounces unsweetened chocolate
1 tablespoon butter

Melt the chocolate and butter together. (The butter helps keep the chocolate malleable enough to slice when solid. I forgot to use anything but straight chocolate when I made this. It was like a rock ... tasty but rock-solid and required a serrated knife to get through the top.) Cool. Pour over the top of the frosted cake.


Tags:Food

Easy Chocolate Buttermilk Cake

This moist, delicious cake from Good Housekeeping Step by Step Cookbook is also one of the easiest I've ever made. Whenever I need a chocolate cake this is the recipe I use. Pair it with the Peanut Butter Frosting to get Rose's favorite combination. Go with the Chocolate and Mint for the birthday cake I remember so fondly from childhood. Or come up with your own.

2-1/4 cups all-purpose flour
3/4 cup unsweetened cocoa
1-3/4 cups sugar
2 teaspoons baking soda
1-1/4 teaspoons salt
1-1/2 cups buttermilk
1 cup vegetable oil
3 large eggs
1-1/2 teaspoons vanilla extract

Preheat oven to 350. Grease two 9-inch round cake pans or 10-inch Bundt pan. (I frequently make this in a 9 x 13-inch pan, baking it for 35-40 minutes.) Dust pans with cocoa.

In a large bowl, combine flour, cocoa, sugar, baking soda, and salt.

In medium bowl, with wire whisk, mix buttermilk, oil, eggs, and vanilla until blended. Add buttermilk mixture to flour mixture and whisk until smooth.

Divide batter between prepared layers or pour into Bundt pan; spread evenly. Bake until toothpick inserted in center comes out clean, about 30 minutes for 9-layers or about 40 minutes for Bundt cake. Cool in pans on wire racks for 10 minutes. Run thin knife around layers to loosen from side of pan. Or, if using Bundt pan, run tip of knife around edge of cake to loosen. Invert onto racks to cool completely.

Meanwhile, prepare frosting of your choice. Place one layer, rounded side down, on cake plate. With narrow metal spatula, spread 2/3 cup frosting over layer. Top with second layer, rounded side up. Spread remaining frosting over side and top of cake. Makes 16 servings.

Tags:Food

Thursday, May 18, 2006

Nutella Nuggets

This recipe won second place in Dallas Morning News' Christmas cookie contest. I whipped it up as a snack for Rose's pals when they had been laboring long and hard making a video with their interpretation of Julius Caesar for English class. The plate of cookies didn't last long.

I had been wondering how they would turn out with simply Nutella, crumbs, and an egg to hold it all together. They were delicious little bites and the powdered sugar really wasn't needed at all. Rich, chewy, intense chocolate and nut flavors ... mmmm, so very good.

Looking this over I see that I totally missed the "wait 20 minutes" step. Darn! Guess I'll just hafta make them again!

1 cup Nutella spread
1 cup graham cracker crumbs
1 large egg
Powdered sugar

With a mixer or in a food processor, mix Nutella, crumbs and egg. Form into 1-inch balls and place 1-1/2-inches apart on a greased cookie sheet or Silpat. Let rest 20 minutes.

Preheat oven to 350 F. Bake 8 minutes. Let cool in pan on rack. Before removing, dust heavily with powdered sugar. Makes 3 dozen.

Monday, December 19, 2005

Chocolate Mint-Filled Cookies

I cannot for the life of me remember where this recipe came from. I only know it is simple, a fantastic combination of chocolate and mint, and an easy way to make sandwich cookies. It has occurred to me that if I needed chocolate cookies for making a crumb pie crust and couldn't find those Nabisco cookies that these would be a good substitute.

Rose made these yesterday to add to our Christmas array.


Step 1:

2/3 cup softened butter
1/2 cup sugar

Cream butter and sugar.

Step 2:
1/4 cup light corn syrup
1 egg
6 ounces melted semisweet chocolate

Add corn syrup and egg and blend. Add chocolate.

Step 3:
2 cups flour
2 teaspoons baking soda
1/4 teaspoon salt

Combine flour, soda and salt and add, beating well. Cover and refrigerate 2 hours or put in the freezer for 40 minutes.

Step 4:
1/3 cup sugar

Form dough into 1/2-inch balls (about 96) and roll in sugar. Place 2 inches apart on ungreased cookie sheets. Bake an even number at a time, 12-15 minutes at 350.

Step 5:
48 chocolate covered 1-1/4-inch wide thin mint patties (we use York peppermint patties, sometimes whole, sometimes halved, depending on how accurate we are with the cookie size)

Remove half the cookies from the sheet. Put a mint patty on top, top with another, and press together firmly with spatula so the melting patty spreads. Cool on the rack. They become crisp and hard.

Monday, December 05, 2005

Chocolate Chunk Biscotti

From our favorite, never-fail cookie book, Cookies Unlimited by Nick Malgieri. I made these delicious, chocolate packed cookies yesterday to freeze for Christmas.

These are a snap except for one bit ... when you are mixing the egg mixture with the flour mixture about halfway through you begin to think that you will never be able to do it. There really is very little liquid to mix in, but if you keep working at it all the ingredients gradually become incorporated.

Also, I know the different chocolates are "added for a subtle richness" but ... since I am lazy and don't care about those subtleties ... I use a 12-ounce bag of semi-sweet chocolate chips. And they are still quite delicious.

Makes about 60 biscotti
(I have never gotten more than 40)

1-3/4 cups flour
2/3 cup unsweetened cocoa powder, sifted after measuring
2 teaspoons baking powder
Pinch salt
1-1/4 sugar
6 ounces bittersweet or semisweet chocolate, cut into 1/4-inch pieces
6 ounces milk chocolate, cut into 1/4-inch pieces
4 large eggs
1 teaspoon vanilla extract

2 cookie sheets or jelly roll covered with parchment or foil

Set a rack at the middle level of the oven and preheat to 325 degrees.

In a bowl, combine the flour, cocoa, baking powder, and salt; stir well to mix. Stir in the sugar and chocolates.

In another bowl, whisk together the eggs and vanilla and using a large rubber spatula stir the eggs into the flour mixture to form a dough.

On a lightly floured surface, press the dough together -- it will be sticky. Flour your hands and the surface lightly, but do not add any more flour to the dough. Divide the dough in half and roll each half into a log the length of your pan (14 to 18 inches). Place the logs on a pan, making sure they are not too close to each other or to the sides of the pan. Press down gently with the palm of your hand to flatten the logs. (Use a dry brush to remove excess flour if necessary.) Bake for about 30 minutes until they are well risen and have also spread to about double in size. The logs are done when, pressed with a fingertip, they feel firm. Cool the logs on the pan.

Reset the racks in the upper and lower thirds of the oven. Using a sharp serrated knife, slice the baked logs diagonally about every 1/4 to 1/2 inch. Return the biscotti to the pans, cut side down, and bake up to 20 minutes longer, or until the biscotti are dry and crisp.

Cool on a rack.

Store the cooled biscotti between sheets of parchment or wax paper in a tin or plastic container with a tight fitting cover.

Monday, October 17, 2005

Paddington Nooner


When Hannah's friends all came over after Homecoming last week for a scavenger hunt and late night movies, this is the cake that I had ready to give them that extra blast of energy.

I got it from the newspaper many years ago and I remember that it originally won second place in a chocolate recipe contest. As for the name, I know there is a character called Paddington Bear but never read the books.

What I do know is that this is hands-down the easiest, most chocolatey, not-too-sweet chocolate cake I have ever made. It always turns out perfectly and is a favorite with everyone.

Step 1:
Cocoa powder
Preheat oven to 350 degrees F. Grease a 12-cup tube or bundt pan and dust sides/bottom with cocoa.

Step 2:
1-1/4 cups strong black coffee
1/4 cup dark creme de cacao or other liqueur (I have used Grand Marnier, creme de menthe, and cherry liqueur ... basically any flavor that goes with chocolate will work here)
5 ounces unsweetened chocolate
1 cup butter, softened
Heat the coffee and creme de cacao over low heat; add the chocolate and butter. Cook, stirring constantly, until smooth.

Step 3:
2 cups sugar
Remove from heat; stir in sugar. Let stand 5 minutes.

Step 4:
2 cups all-purpose flour
1 teaspoon baking soda
1 teaspoon salt
Sift together. Add chocolate mixture to flour in small parts.

Step 5:
2 eggs, lightly beaten
1 teaspoon vanilla
Add eggs and vanilla. Beat until smooth. Pour into prepared pan. Bake approximately 1 hour or until cake tests done. Cool completely on rack before unmolding. Best if served cold.

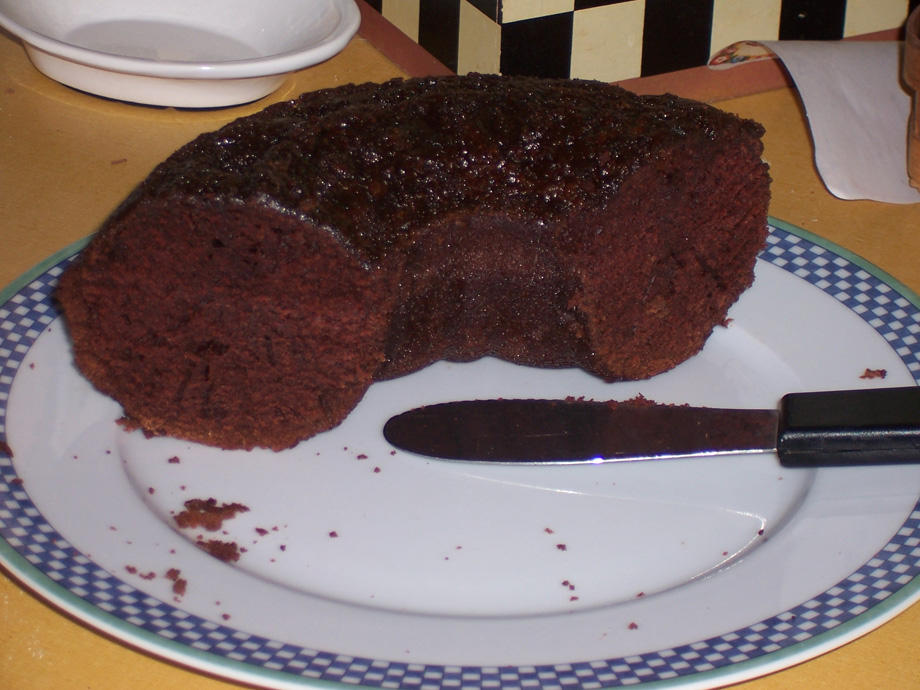
UPDATE: Photo now included, per ukok's request. Much thanks to Veronica on the Verge who provided food photography (along with rave reviews ... she used peppermint schnapps as a flavoring liqueur).

Tuesday, August 23, 2005

Doboschtorte

For those who were drooling over Hannah's Birthday Cake, here is the recipe from Time Life Foods of the World: The Cooking of Vienna's Empire. As I mentioned I didn't make the top caramel layer but just frosted it all with the chocolate filling. No one complained. However, I am giving the complete instructions here. This may look daunting but is simple although it does require a candy thermometer ... and enough time to not rush through anything.

The Cake
1/2 pound unsalted butter, softened
1 cup granulated sugar
4 eggs, lightly beaten
1-1/2 cups all-purpose flour
1 teaspoon vanilla extract

Preheat oven to 350 F. Cream butter and sugar by beating them together against the side of a mixing bowl with a wooden spoon. Beat in the eggs, then stir in the flour and the vanilla extract. Continue to stir until the mixture becomes a smooth, firm batter.

With a pastry brush or paper towel, butter the underside a 9" layer cake pan, then dust it with flour. (I can never get 7 layers out of the 9" pan so I always use 8" pans.) Strike the pan against the edge of a table to knock off the excess flour. With a metal spatula, spread the batter as evenly as possible over the underside of the pan to a thickness of 1/8". Bake in the middle of the oven 7 to 9 minutes, or until the layer is lightly browned around the edges.

Remove from the oven and scrape off any batter that has dribbled down the sides of the pan. Loosen the layer from the pan with a spatula, put a cake rack over it and invert. Wipe the pan with a paper towel, butter and flour it again and repeat the baking process with more batter. (You may, of course, bake as many layers at a time as you have cake pans.) Continue until all the batter is used. You should have 7 exactly matching layers.

The Filling
1-1/3 cups sugar
1/4 teaspoon cream of tartar
2/3 cup water
8 egg yolks
1/2 cup dark unsweetened cocoa
2 teaspoons vanilla extract
2 cups (1 pound) unsalted butter, softened

In a small saucepan, combine the sugar, cream of tartar and water. Stir over low heat until the sugar is completely dissolved, then turn the heat to moderately high and boil the syrup without stirring until, if tested, it registers 238 degrees on a candy thermometer, or until a drop of the syrup in cold water forms a soft ball.

Meanwhile, in a mixer, or by hand with a rotary or electric beater, beat the 8 egg yolks for 3 or 4 minutes, or long enough to thicken them and lighten them somewhat in color.

Pour the hot syrup into the eggs, continuing to beat as your pour in the syrup in a slow, steady stream. If you are using a mixer, beat at medium speed until the mixture cools to room temperature and changes to a thick, smooth cream. This usually takes from 10 to 15 minutes. (If you are beating by hand, set the mixing bowl in a pan of cold water to hasten the cooling and add the syrup a little at a time.)

Continue to beat until the cream is cook, thick and smooth, then beat in the cocoa and vanilla extract. Last, beat in the butter, adding it in small pieces until it is all absorbed. Refrigerate while you make the glaze.

The Glaze
2/3 cup sugar
1/3 cup water

First, place the most attractive of the cake layers on a cake rack set on a jelly-roll pan, then mix the sugar and water together in a small heavy saucepan. Without stirring, cook until the sugar dissolves, boils and begins to darken in color. Swirling the pan, continue to boil until the caramel becomes a golden brown, then pour it over the layer. With a buttered knife, quickly mark the glaze into 16 equal wedges, cutting nearly, but not quite, through to the bottom of the glaze. This mirrorlike layer will be the top of the Torte.

Assembling the Torte
Place a cake layer on a serving plate and, with a metal spatula, spread chocolate filling over it to a thickness of 1/8 inch, then top with another cake layer. Continue with the other layers, finishing with a layer of filling and the glazed top. Use the rest of the chocolate filling to cover the sides of the cake, smoothing it on with a spatula and refrigerate. To serve, slice along the lines marked in the glaze.

Tuesday, August 16, 2005

Mexican Chocolate Cake

I have seen a lot of recipes with chocolate that are spiced up with a bit of cayenne but I have never known anyone brave enough to try one ... until now. My dear friend, Deb, says that anyone who likes the Spicy Ginger Cake is gonna love this. She also gives this indepth recipe feedback, "Yum, yum, yum....."

I'm gonna hafta give it a shot for sure.

From Real Simple

CAKE
1 1/2 cups all-purpose flour
1 cup sugar
1/2 cup unsweetened cocoa
2 teaspoons cinnamon
1 teaspoon baking soda
1/4 teaspoon cayenne pepper or ground Mexican chili powder
1/4 teaspoon salt
1 cup cold water
1/4 cup canola oil
1 tablespoon balsamic vinegar
1 tablespoon vanilla extract

CHOCOLATE GLAZE
1 cup confectioners' sugar
1/2 cup cocoa
6 tablespoons water
10 small fresh strawberries

Heat oven to 350 degrees F. Lightly coat an 8-inch round cake pan with vegetable cooking spray.

Combine all the cake ingredients in a mixing bowl and stir until smooth. Pour into the pan and bake 25 to 30 minutes or until a toothpick inserted in the center comes out clean. Cool in the pan on a wire rack for 10 minutes. Remove from pan and cool completely. When the cake has cooled, whisk together the first three glaze ingredients. Dip each strawberry into the glaze and set aside. Pour the remaining glaze over the cake and arrange the strawberries on top. Set aside to dry, about 30 minutes.

Yield: 6 servings

NUTRITION PER SERVING
CALORIES 450(0% from fat); FAT 12g (sat 2g); PROTEIN 6mg; CHOLESTEROL 0mg; CALCIUM 36mg; SODIUM 312mg; FIBER 6g; CARBOHYDRATE 87g; IRON 4mg

Almond Boneless Chicken

We found this in Cook's Country and it's become a special treat dish. For one thing — fried chicken cutlets. For another, as my hus...